Start with a firm box and the right amount of paper
A rectangular box is one of the easiest shapes to wrap neatly because its straight edges give you a guide for every fold. Set it on a clear, flat surface and gather wrapping paper, scissors and tape. If the lid is loose, secure it before wrapping so it does not shift while you work. Thicker paper can hide minor bumps, but it may need a firmer crease; thinner paper folds easily but can wrinkle if pulled too hard.
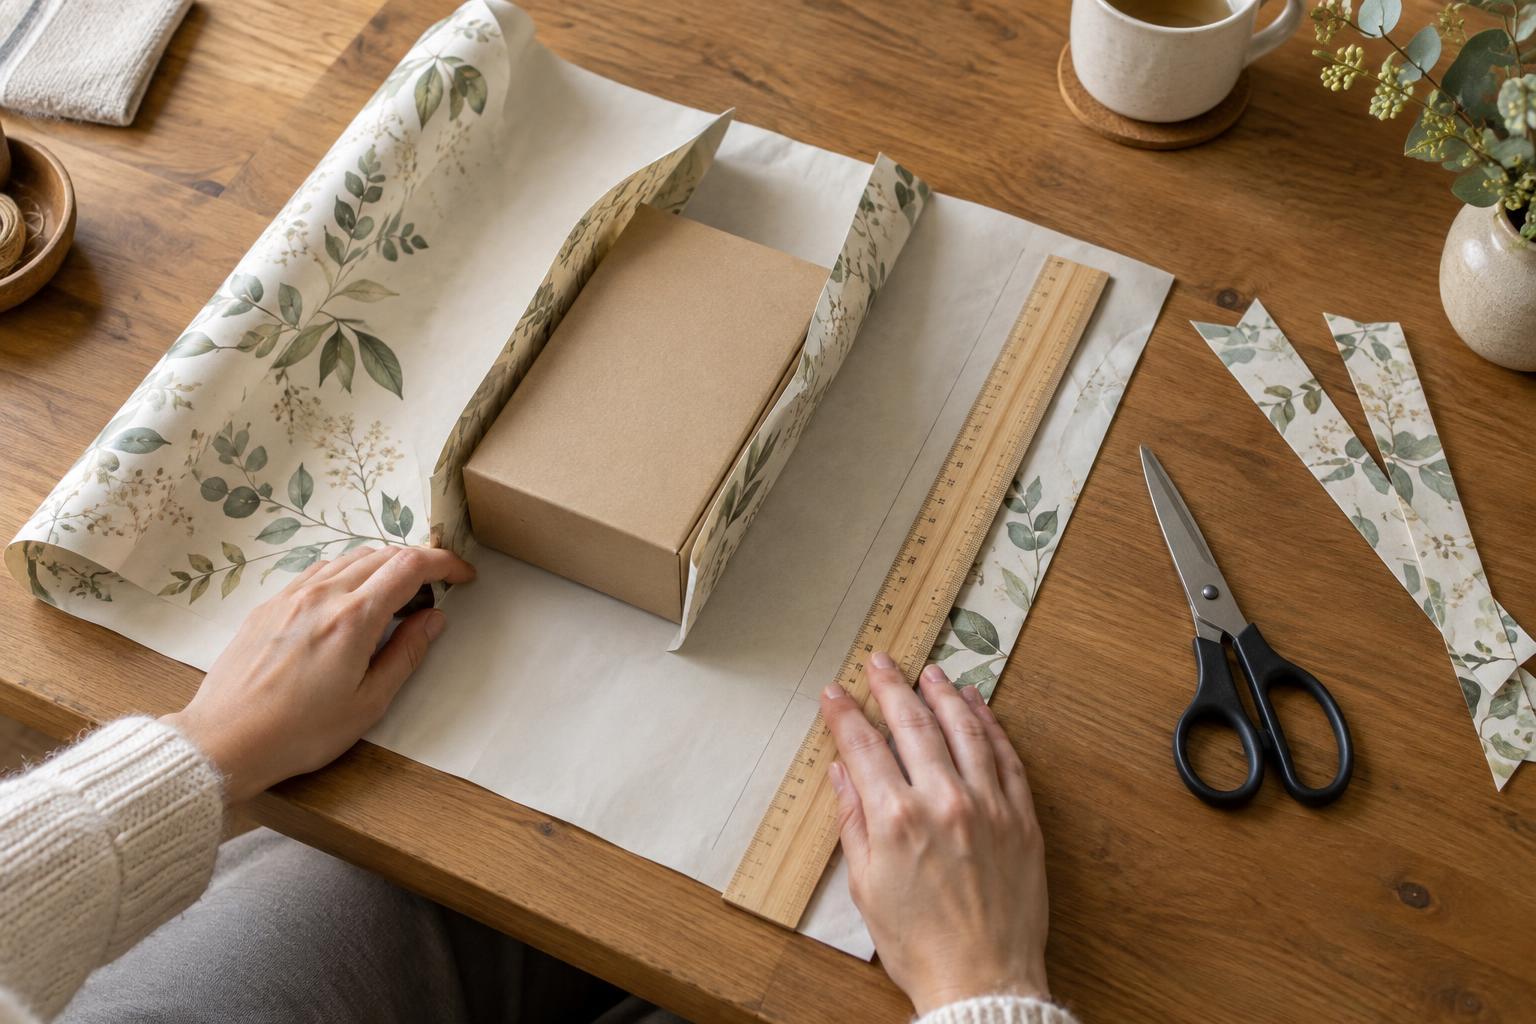
Place the box upside down on the back of the paper. Bring the long edges of the paper up and over it to check their overlap. You need enough for one edge to cover the other by a small margin, not enough to wind around the box twice. At each short end, leave paper that reaches a little more than halfway up the box’s height. Too little makes the end difficult to close; too much creates bulky corners. Once you are happy with the fit, cut the sheet as straight as you can.
Wrap the long sides first
Keep the box upside down so the main seam will sit underneath the finished gift. Bring one long edge of paper over the box and hold it snug against the surface. Run a finger along the upper edge of the box to establish a clean crease, then secure the paper underneath with a small piece of tape. Avoid stretching the sheet: the aim is a smooth fit, not a tight one that bends the paper or pulls it away from the corners.
For a polished seam, fold the exposed edge of the remaining paper inward by about a finger’s width. Bring that folded edge over the first layer and tape it down on the underside of the box. The fold hides a ragged cut edge and gives the seam a straight line. Check that the paper lies flat along both long sides before moving to the ends. If it has drifted, lift and reposition the tape now rather than trying to correct it with the final folds.
Make crisp folds at the short ends
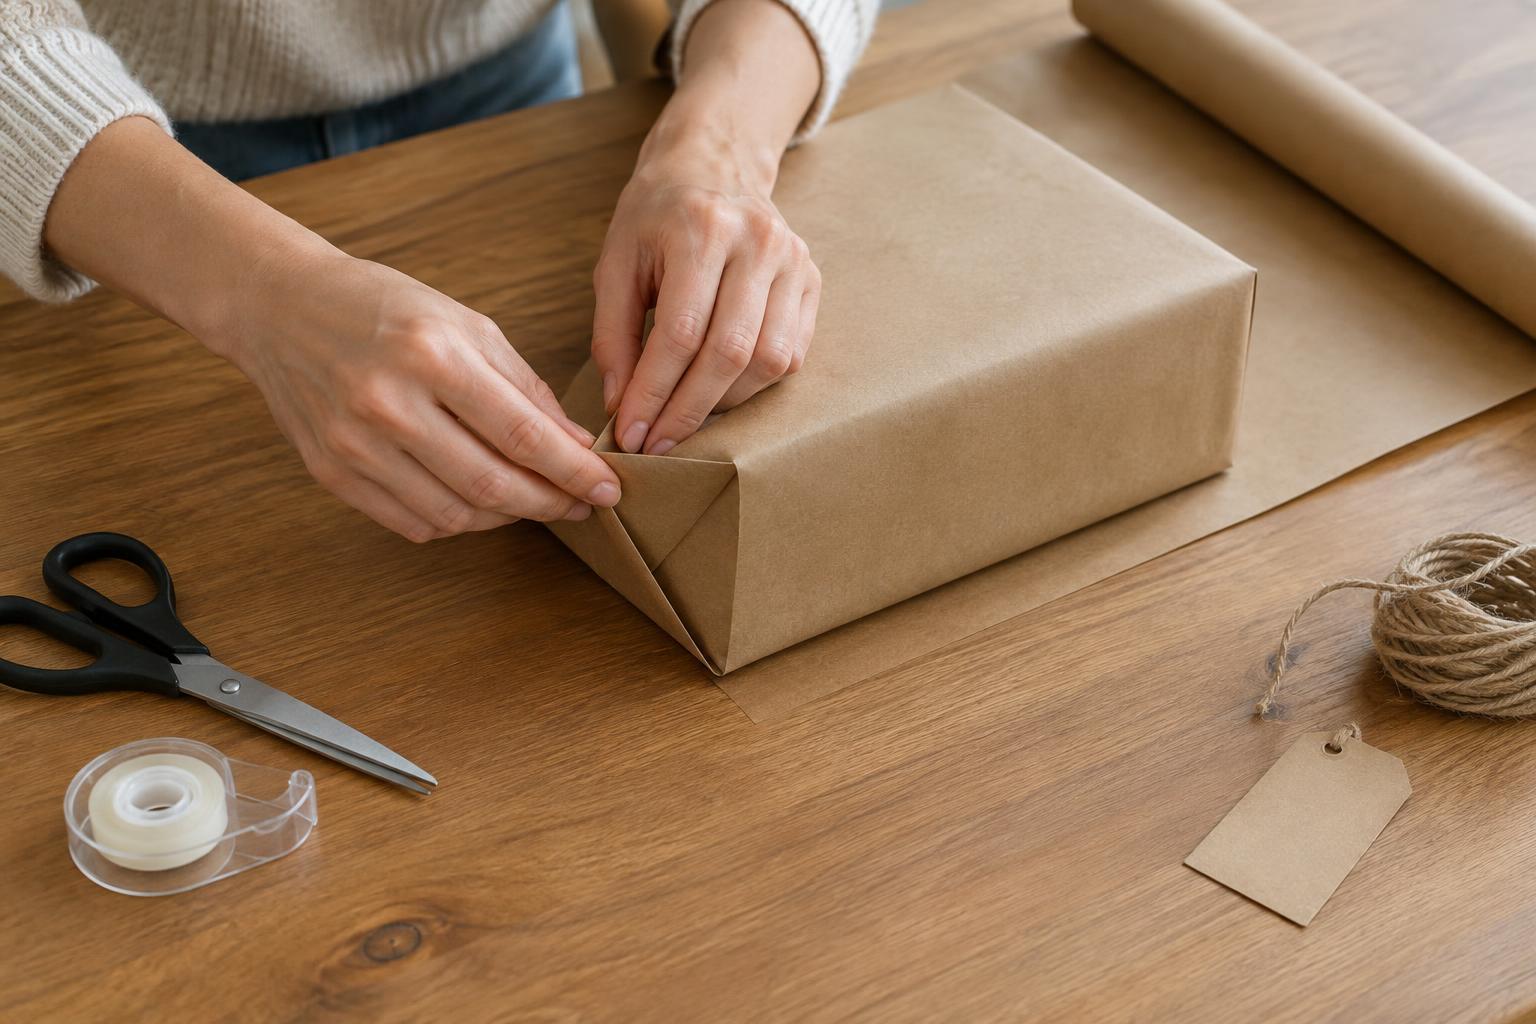
Turn one open end toward you. Press the top section of paper down against the end of the box. As it drops, guide the paper at the left and right edges inward along the box’s corners. This forms two triangular side flaps. Crease the lines where those flaps meet the top and sides of the box. Use your fingertips to flatten each triangle so the paper follows the shape of the box rather than puffing outward.
Next, fold the side triangles inward, one at a time, keeping their points flat against the end. Fold the bottom section up over them and crease it along the lower edge of the box. If its raw edge will remain visible, turn that edge under before taping the flap in place. Repeat at the other end. Folding the ends in the same order helps them look balanced, although the most important detail is that each layer lies flat before the next one covers it.
Fix bulk without starting over
If a corner looks rounded, hold the box steady and pinch the paper along the box’s edge. A slow, firm pass with your fingertip can sharpen a soft crease. If the end flaps bunch up, the sheet may be too long at that end. Before fastening the final flap, trim away a little excess or fold it inward where it will be hidden. Make small adjustments; cutting too close can leave a gap.
Wrinkles across a broad surface usually mean the paper was secured before it was lying flat. Carefully release the nearest piece of tape, smooth the paper from the center toward the edge, and fasten it again. A tiny imperfection rarely needs covering, but ribbon or a paper band can provide a deliberate finishing detail if you like.
Finish with a personal touch
Turn the box right side up and check that its visible surfaces are smooth. Add a gift tag, a short handwritten note or a simple length of ribbon, leaving enough space for the paper’s clean lines to show. If you are wrapping several boxes, repeat the same folding method on each one; coordinated folds can make different papers feel like a set.
For a reusable option, try a piece of fabric large enough to knot securely around the box. It will produce softer corners than paper, so let the material’s shape be part of the presentation rather than trying to force sharp creases. Whether you choose paper or fabric, careful measuring and unhurried folds do more for a tidy result than elaborate decoration.