Decide how the box should open
Before cutting paper, check whether the round box has a removable lid. If you want the recipient to use the box again, wrap the lid and base separately so the lid can still lift off. For a box that will be opened by removing all the paper, one continuous sheet can cover the whole shape. Neither approach is automatically neater: separate pieces preserve the opening, while a single piece can give you an uninterrupted pattern around the sides.
Also consider the shape beneath the paper. A shallow round box often looks tidy with folded ends, but a tall box with a narrow top may need many small pleats. If the lid has a raised rim, wrapping it separately can help the paper follow that edge rather than pulling tight across the gap. Set the gift inside before you start, then close the lid fully; wrapping an empty box may leave you handling the finished paper more than necessary.
Measure for the sides and ends
For a continuous wrap, roll the box once across the paper to estimate the length needed around its curved side. Add a modest overlap for a secure seam rather than cutting exactly at the meeting point. To find the other dimension, measure the height of the box and allow enough paper beyond both the top and bottom edges to reach approximately to the center of each circular end. A little extra is easier to trim than too little, but long overhangs create thick folds.
Place the patterned side of the paper face down, if it has one, and position the box so its side will roll along the longer dimension. Test the fit before taping: the paper should cover the curved wall without stretching, and the overhang should look roughly even at each end. For a lid-and-base wrap, measure each piece independently. The lid may be wider or deeper than the base, so using one set of measurements for both can leave an exposed edge or an unnecessarily bulky fold.
Make small, even folds around each circle
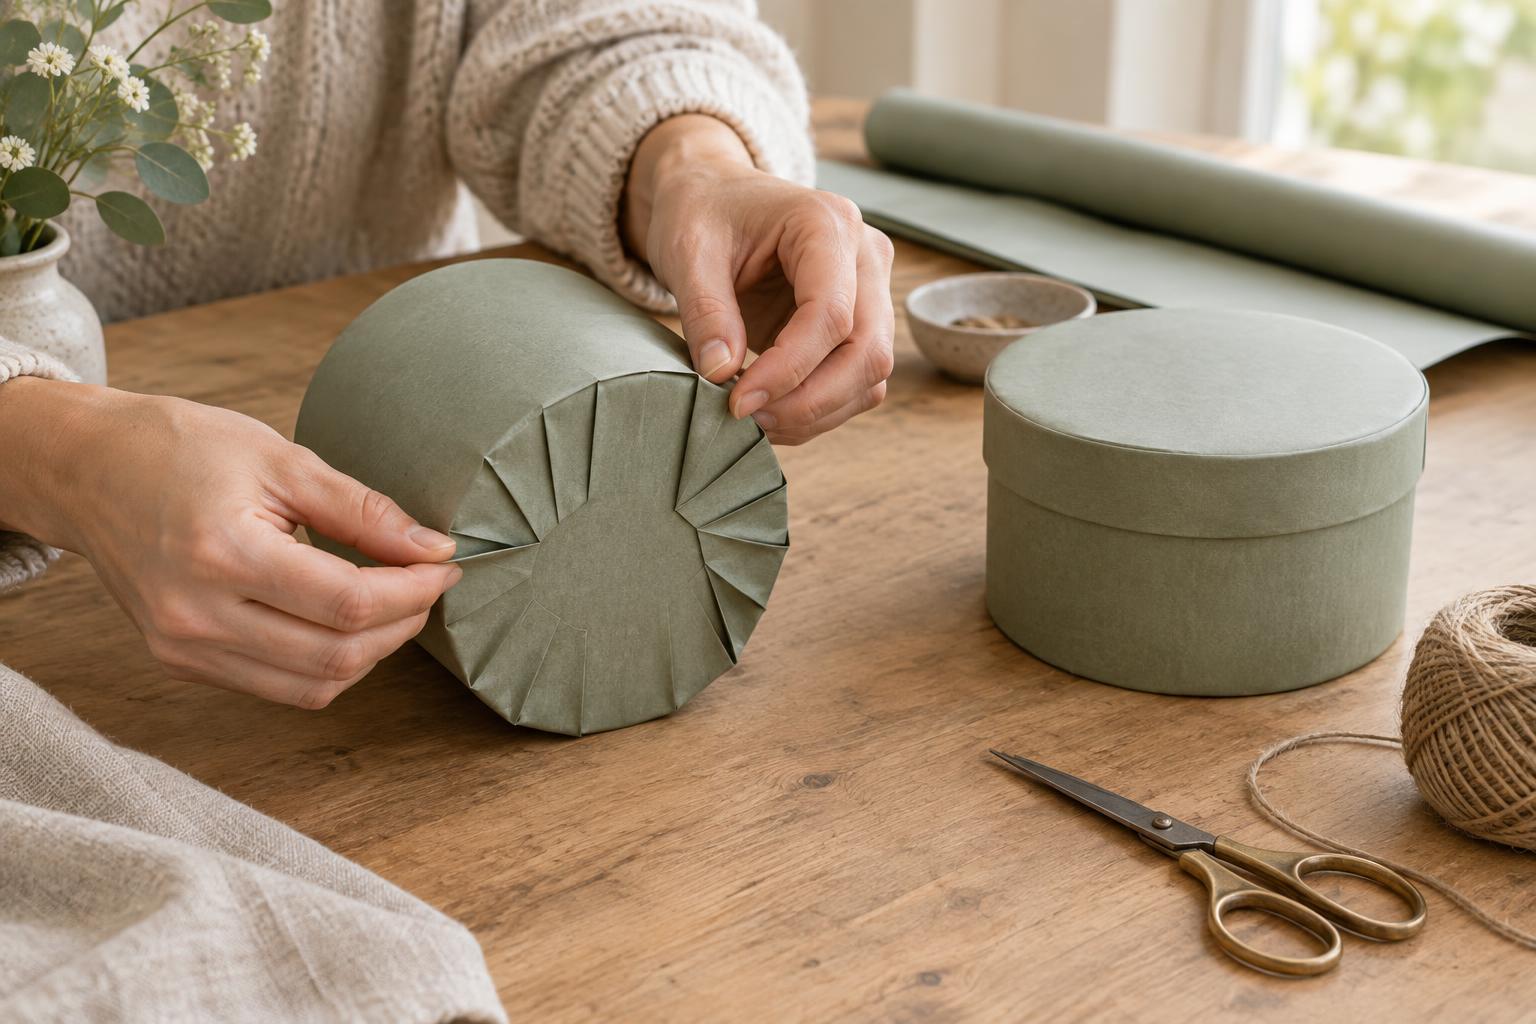
Wrap the paper around the side first, smoothing it with your palm as you roll the box. Secure the overlap to the paper beneath it, keeping tape off the box if its surface could be marked. Turn one circular end toward you. Fold a short section of overhanging paper inward toward the center, then work around the edge, letting each new fold slightly overlap the previous one. Keep the folds similar in width and gently flatten them as you go. Thin paper usually pleats more easily than heavy paper.
If the folds begin to stack into a lump before you reach the center, pause rather than forcing them down. You may have too much paper beyond the edge; carefully trim a small amount and try again. Secure the final fold, then repeat on the other end. The underside does not need to look identical to the top, but both should lie flat enough that the box sits steadily. When wrapping a lid separately, keep folded paper clear of the inner lip so the lid still fits.
Choose a finish that suits the box
A small paper circle can cover the meeting point of the pleats if you prefer a simpler finish. Cut it from spare wrapping paper or a coordinating sheet, check that it hides the fold ends, and attach it to the folded paper. This is also a useful fix if the final pleat looks less even than the others. For a box with an attractive lid, another option is to cover only the curved sides and leave the top visible. Fold the paper edges just over the rims, taking care not to obstruct the lid.
Finish with a ribbon around the side of the box, a tag tied to a separate band, or a handwritten note tucked beneath the ribbon. Avoid piling decorations onto a lid the recipient needs to lift. Before setting the gift aside, test how it opens and check for loose tape or paper that catches at the rim. The goal is not perfectly identical folds; it is a presentation that feels considered and makes the gift pleasant to open.