Start with ribbon that suits the gift
A bow is easier to secure when the ribbon has a little texture. Grosgrain and cotton ribbon tend to grip themselves well, while smooth satin can slip as you work. Wired ribbon holds fuller loops, but it can feel bulky on a small box. Choose a width that leaves room for a knot without hiding the whole gift. If you are wrapping a delicate item, avoid pulling the ribbon so tightly that it bends the box or creases the paper.
Cut more ribbon than you think you need for the first attempt. You can trim the tails later, but short ends make it difficult to tighten a knot and adjust the loops. Set the wrapped gift on a flat surface with its top facing up. Before tying, turn the ribbon over if necessary so the side you want to show will face outward on the finished bow.
Anchor the ribbon before making the bow
Lay the ribbon across the top of the box, leaving one end long enough for a bow and tail. Take the other end underneath the box and bring it back to the top. Cross the two ends where you want the bow to sit, then pull them snug. For a simple band, tie directly at that crossing. For the familiar crossed-ribbon look, turn the box or guide the longer end around its other direction before returning it to the crossing.
The important step is to make a firm first knot before forming loops. Pass one end over and under the other, then pull the ends in opposite directions, close to the box. A gentle press on the knot with a fingertip helps hold it while you reposition your hands. If the ribbon slides around the package, center the crossing again now; it will be harder to move once the bow is finished.
Tie two loops without losing the tension
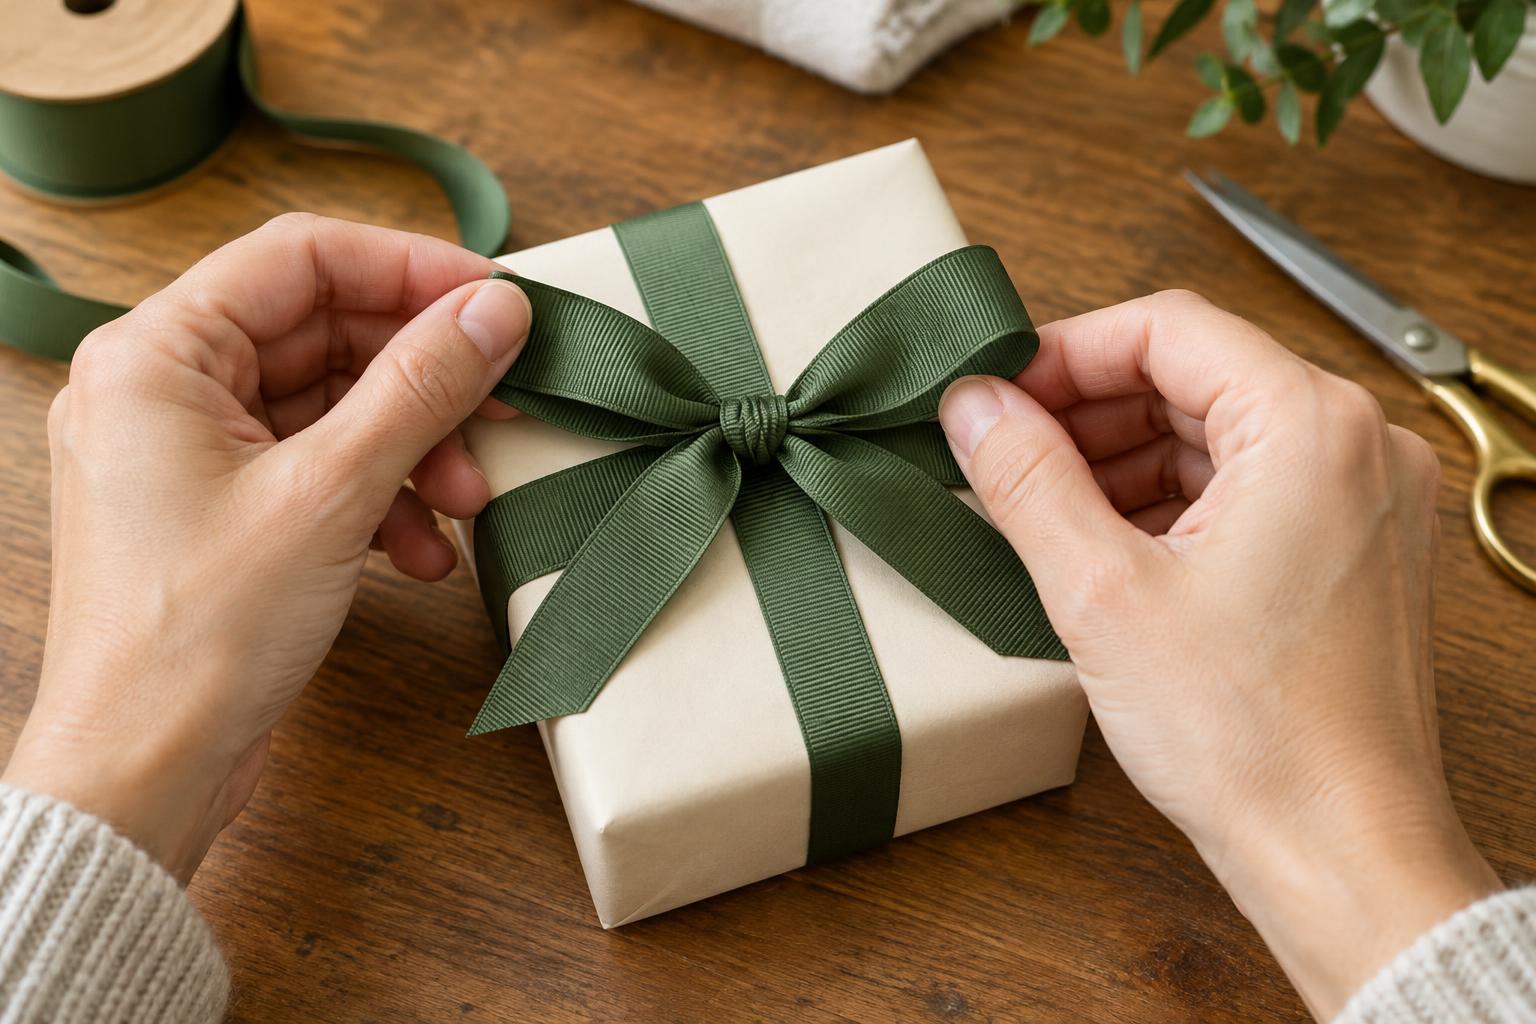
Make a small loop with one ribbon end and pinch its base against the first knot. Bring the other end over the loop, tuck it through the opening behind it and pull out a second loop. This is much like tying a shoelace. Pull on the two loops, not the tails, to tighten the center. Keep your fingers close to the knot as you pull so the ribbon does not loosen around the box.
Adjust the bow in small steps: pull a loop to shorten its matching tail, or pull a tail to shorten its loop. Aim for loops of similar size, but do not worry about perfect symmetry. Once they look balanced, give the loops one final, steady pull. If the first knot has opened up underneath, untie the bow and tighten that knot again rather than trying to disguise a loose band with bigger loops.
Help a slippery bow stay tied
For satin or other slick ribbon, tie the first knot firmly and keep the bow loops modest in size. Large, heavy loops are more likely to droop or work loose. After shaping the bow, you can tie a second, gentle knot using the two loops. This helps secure them, though it may make the bow less easy to untie. Test it first if you want the recipient to be able to open the gift without cutting the ribbon.
If you want a clean look without an extra knot, place a small piece of removable tape under the ribbon band on the underside of the box to stop the band shifting. Tape is less useful for securing the bow itself and may mark delicate ribbon or wrapping paper. For a gift that will be carried in a bag, check the bow after packing: pressure from other items can flatten loops even when the knot remains secure.
Finish the tails and give it a final check
Trim the tails only after the bow is secure. Fold the end of each tail lengthwise and cut diagonally from the folded edge toward the outer corner to make a neat V-shaped notch, or cut across at an angle for a simpler finish. Keep scissors clear of the wrapping paper. If the ribbon frays easily, make a clean cut and handle the ends as little as possible.
Lift the gift briefly by its sides, not by the ribbon, and check that the band stays centered. Straighten any twisted sections and fluff the loops with your fingers. A small bow with a snug knot will often look more considered than an oversized one that needs constant fixing. Once it holds its place, a handwritten tag tucked beneath the ribbon is all the extra presentation you may need.